Saturday 21 July 2012

Scarf and has anyone got a home for these bunnies?

Two things to share with you today, bunnies who are looking for a new home,

P1010166

and a work in progress:

P1010164

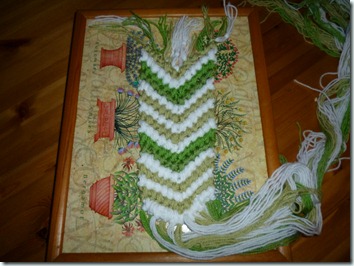
First my scarf, it’s a knotted scarf made from some wool I had knocking about.  Yes, yes I know it’s the first sunny day we’ve had this year and I know that it’s July, but as I’ve already made & sent off my Christmas projects for Simply Homemade magazine, I’m convinced it’s much later in the year than it really is!  Anyway this scarf was inspired by a friendship bracelet in this month’s issue of Mollie Makes,
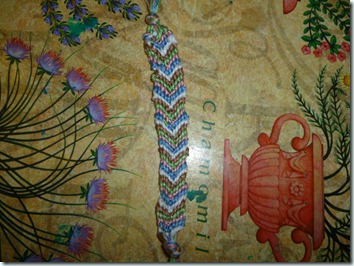
P1010165I made it one evening and when I showed my daughter the next morning, she asked why I was making a mini-scarf.  So I thought I’d upsize it just a bit, change the pattern around and voila, a scarf is born.

Right the bunnies – I was given these little bunnies,
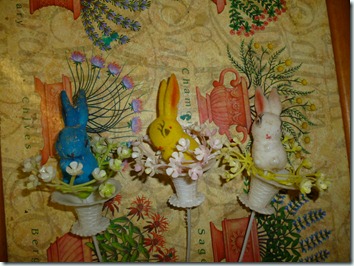
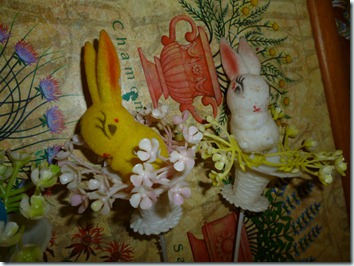
P1010166but I really don’t have the space or the inclination to keep them, so I thought I’d ask out there in blogland if anyone would like them.  There are 6 of them in all, 2 of each colour, and the bunnies are covered in a sort of flock(?) type covering.  Sadly one of the blue bunnies has had a bit of a fight and the fabric torn away from his ear.    They have some sort of wire spike at the bottom.

P1010168

Ahhhh – look at that cute face, who could resist it!

If anyone would like them, just leave me a comment and at the end of next weekend I’ll see who wanted them and post them out to you.  If more than one person wants them then I’ll pick names from a hat.  I’m sorry I can only post them to the UK, (as I’m not quite sure how I’d declare them on the customs form).  If nobody wants them then boo hoo they’ll have to find a new home at the local charity shop.

Enjoy the rest of your weekend.

Sally

xxx

Sunday 15 July 2012

Lined Coin Purse Tutorial


I saw my sister-in-law last week and she asked me how to make small zipped purses.  I know there are lots of other tutorials on this subject, but as it was a personal request I thought I’d write one -  so especially for Debs, here is a quick tutorial. 

Cut out 4 pieces of fabric, 2 for the outer and 2 for the lining.  These can be any size you like, but mine were about 5 inches by 4 inches.  Just make sure the zip you are going to use is wider than the fabric.

 pursetut1

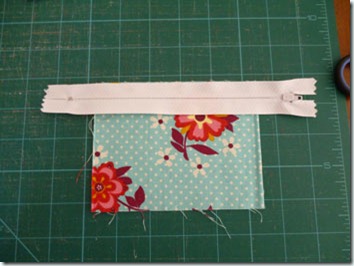
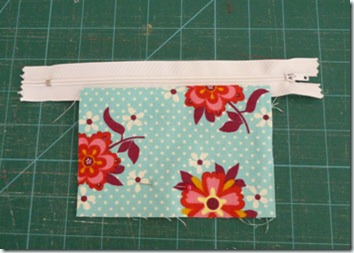
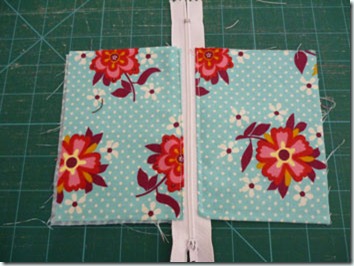
Lay one piece of outer fabric (flowery one in my case) face up on the table and lay the zip along the top edge.  The zip’s teeth should be face down on top of the fabric.

pursetut2

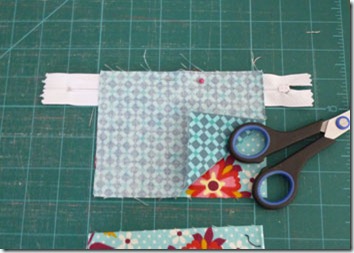
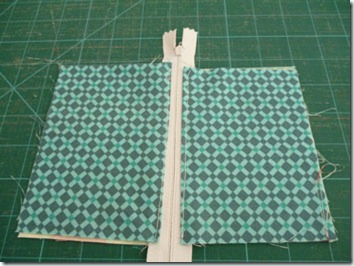
Next step is to lay one of the lining pieces face down on top of the zip, again lining up the top edge of the zip with the top edge of the fabric.

pursetut3

Pin the ‘zip sandwich’ together and then use a zip foot to sew all pieces together, along the top edge.  Pull the front and back pieces back away from the zip and position then wrong sides together.  You should be able to see the zip teeth now.  At this point it helps to press the fabric away from the zip.

pursetut4

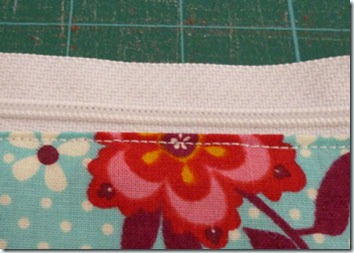
Still with the zip foot on the machine, topstitch along the edge of the fabric to hold the layers together, you can see what I mean in this photo.

pursetut5

Lay the other piece of outer fabric face up on the table and place the zip (with the pieces attached) on top of the outer fabric.  Again the zip teeth should be facing downwards.  The outer fabrics should be placed with their right sides together.

pursetut6

Take the other lining piece and lay it face down on top of the zip, lining up the top of the fabric with the top of the zip. 

pursetut7Pin along the top and sew together.  Open out the purse like the photo below, and top stitch as before, along the edge you have just sewn.

Front:

pursetut8

Back:  (oops looks a bit wonky here – I blame the camera!)

pursetut9

IMPORTANT: Open the zip half way now – otherwise you’ll have problems when you try to turn the purse in the right way later & I’m not taking the blame for not pointing it out clearly!!!!!!

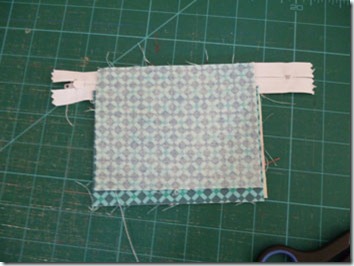
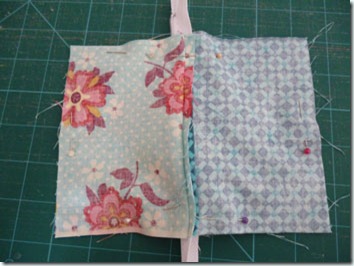
Take both pieces of outer fabric and place them so that their right sides are together and pin.  Take both lining pieces and pin them so that their right sides are together.  The zip will be in the centre.

pursetut10

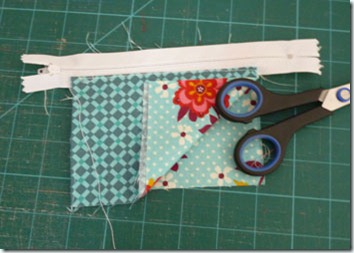
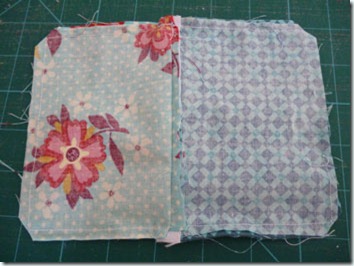
Starting from the centre of the lining pieces, sew a rectangle around the outside of this large rectangle.  Be careful when sewing across the zip piece – you don’t want the metal zip ends to break your needle.  If you are likely to hit the metal pieces, just move the seam slightly further from the edge to avoid it.  Do not sew right up to where you started, leave a gap of about 2 inches, this will allow you to turn the purse in the right way.  Clip the corners and cut off the unused bits of the zip.

pursetut11

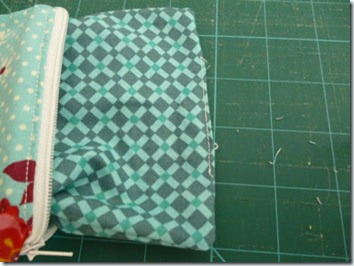
Turn the purse through the hole in the lining and push the purse into the correct shape.  Pull the lining out of the purse and topstitch the hole in the lining closed. 

pursetut12

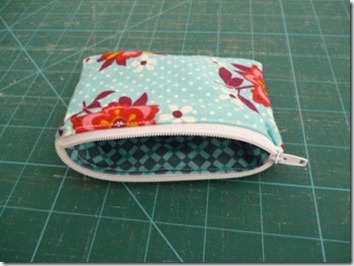
Push the lining back in and you’ve now finished your purse.

pursefinished

Right Debs, no more excuses, I expect to see lots of these little purses next time we come to visit!  For anybody else who’s actually made it to the end of my tutorial, I hope it’s been helpful.

Sally

xxx