Thursday 26 January 2012

Work in progress–window seat cushion

Apologies for the lack of posting – I’ve had a bit of a busy couple of weeks working.  Sadly no crafting accomplished, but I have earned a little bit of money so that I can indulge my fabric habit!

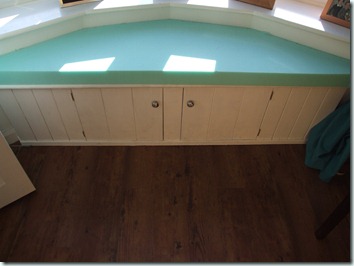
Anyway, my latest project is to make a cover for my window seat.

DSCF9144

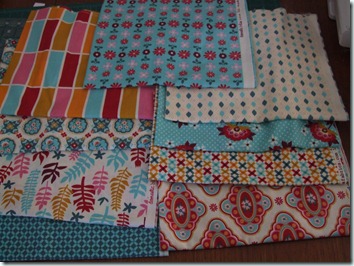
I order some fabric from Fabricworm, which arrived a couple of weeks ago & which I absolutely love.

DSCF9142

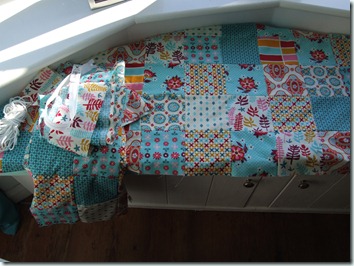
So for the last couple of days I’ve been cutting squares and sewing them together.  I’ve managed to make the top, bottom and side pieces, all that is left now is to put them together.

DSCF9145

I did start cutting the squares out with the Accuquilt cutter I won, but sadly the 5” square die doesn’t cut at all cleanly and I was finding that I had to finish cutting all of the squares out manually, and I was getting a bit annoyed with it.  So I went back to the cutting mat & rotary cutter and millions (well, it felt like that) of squares later I had enough to make the cover.

Shall I say I’ll put it all together tomorrow? or will you hold me to it?  I know - I’ll say I’ll finish it by the end of next week and then it’ll be a nice surprise & will make me look highly efficient when I finish it early!

Sally

xxx

Tuesday 3 January 2012

Tutorial Simple Paper Boxes

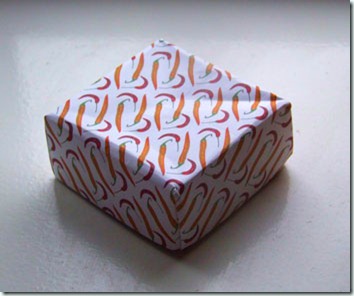
I thought I’d share a quick tutorial with you today.  Simple paper boxes that are ideal for putting small handmade gifts or chocolates in.

boxfinished

The good thing about these boxes is that you can make them whatever size you like – there is no real measuring involved and only 4 cuts to make – easy huh? 

You will need 2 square pieces of paper  - 1 for the top & 1 for the bottom of the box.  A4 paper cut into a square will make a box base or lid 3” x 3” (7.5cm x 7.5cm)

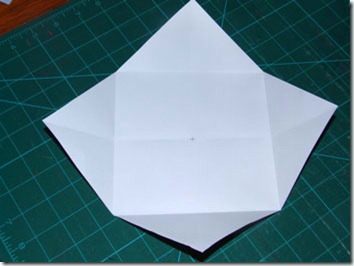
Find the middle, I would suggest you draw faint lines on the wrong side from corner to corner to find the middle.  These won’t be seen when the box is finished.  Then take each corner to the middle point and crease the fold.

box1

Repeat for each of the corners

box2

Then open them out again.

box3

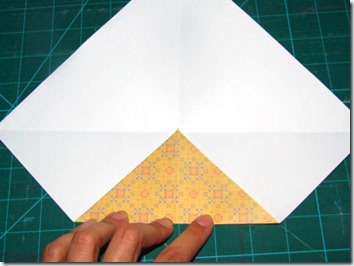
Next fold each corner up until it touches the fold on the opposite side

box4

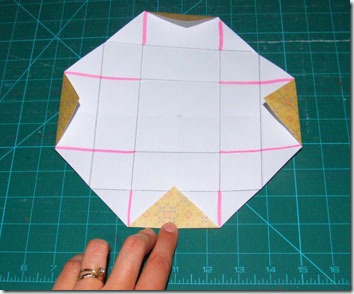
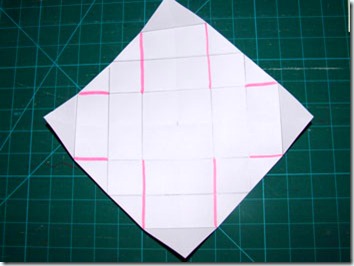
Repeat for all of the other corners.  Then fold each corner down to touch the line nearest to it.  (ignore the pink lines – they will be used later, I forgot to photograph this step so did it later!)

box5

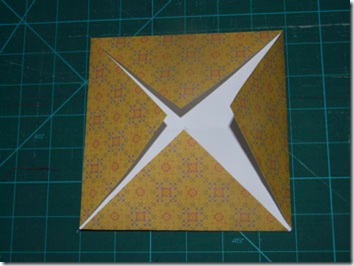
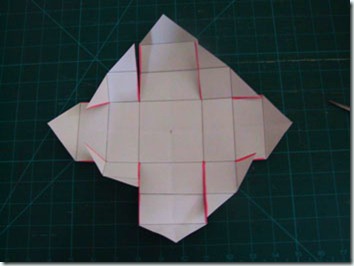
Are you still with me?  I hope this has made some sense!  Folding over now, next take your scissors and cut along the lines I’ve highlighted in pink (see I told you they would be used later!)  The ideas is that you cut down past 2 folded lines on opposite corners & down one fold on the other two corners.  Hopefully these photos will explain things a bit better.

box6

box7

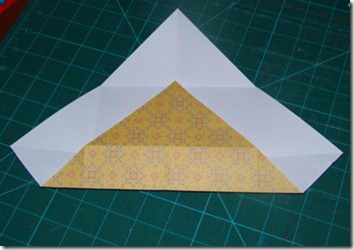
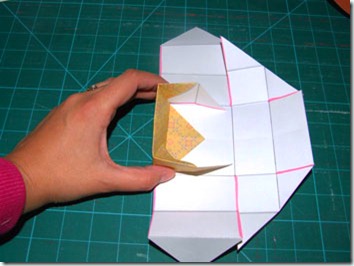
Now for the part where you need more hands than you actually have!  Take one of the corners with the shorter cut & fold it over as in the photo below.  You will have to reverse the fold nearest to the corner point to make it lay flat on the base of the box.

box8

Fold the opposite corner in the same way and hold it.

box9

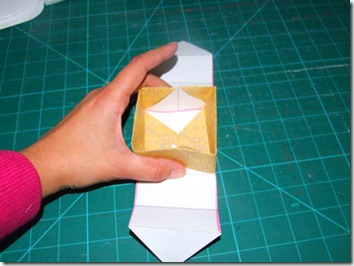
Then fold one of the longer edges up and over the sides.

box10

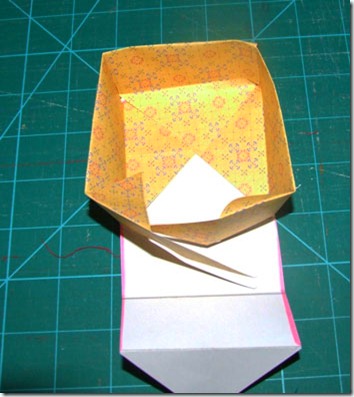
Repeat for the other side.

box11

Hey presto, the bottom of a box.  Repeat the above for a second time to make the lid of the box.  If you are using paper you can make both pieces the same size & they will fit together.  If you are using card or thicker paper, I suggest you make the bottom of the box slightly smaller so it will fit nicely inside the top.

Hope these boxes come in handy for lots of things.

Sally

xxx

Sunday 1 January 2012

Lucky End to the Year

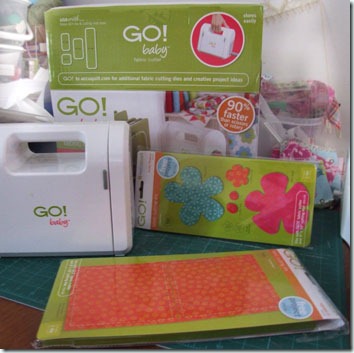
At the beginning of December, I was lucky enough to win an Accuquilt Go!Baby cutter & 3 dies, in a giveaway over on Pings&Needles. (Go have a look at Sarah’s blog if you’ve not visited before – its fab!)  Well it arrived 2 days ago (the cutter that is) & I’ve been playing with it ever since!

go!baby

(I really should tidy my workspace before taking photos – maybe a new years resolution?)

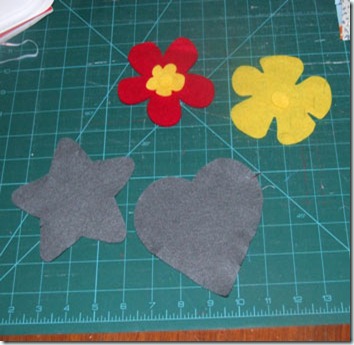
Look at what I’ve cut so far:

gofelt

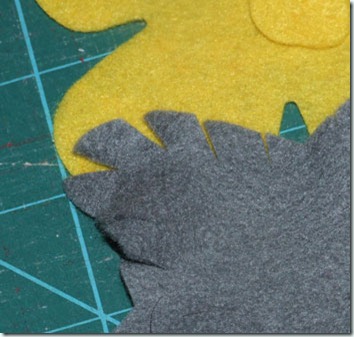
Some felt flowers using the funky flowers die, and grey shapes using the rag star & heart die.  Here is a close up of the fringing on the edge of the star:

gofelt2

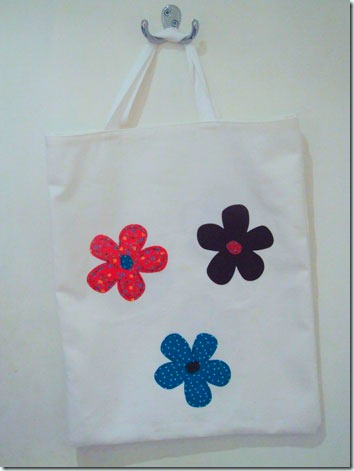
I also cut some flowers from bright fabrics backed with bondaweb and then appliqued them to both sides of a plain white tote bag using free motion embroidery.

gobag1

gobag2

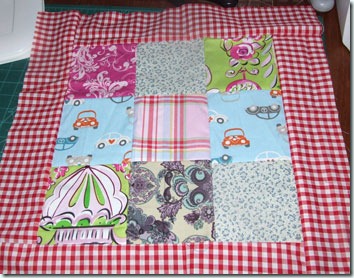
I then cut some 5” squares with the third cutter and used them to start making a cushion cover for my living room.

gocushioncover

Phew, I have been busy over the last two days! 

So thank you to Sarah at Pings&Needles for finishing my year in a really lovely way.

Hope that you all have a very Happy New Year, and here’s hoping that 2012 will be filled with lots of fabric and crafting.

Sally

xxx